Wooden Drawer Tool Chest Plans
How To Make A Wooden Tool Chest With Drawers
Build A Wooden Tool Chest of Drawers
A slap-up storage solution for pocket-sized parts and tool storage
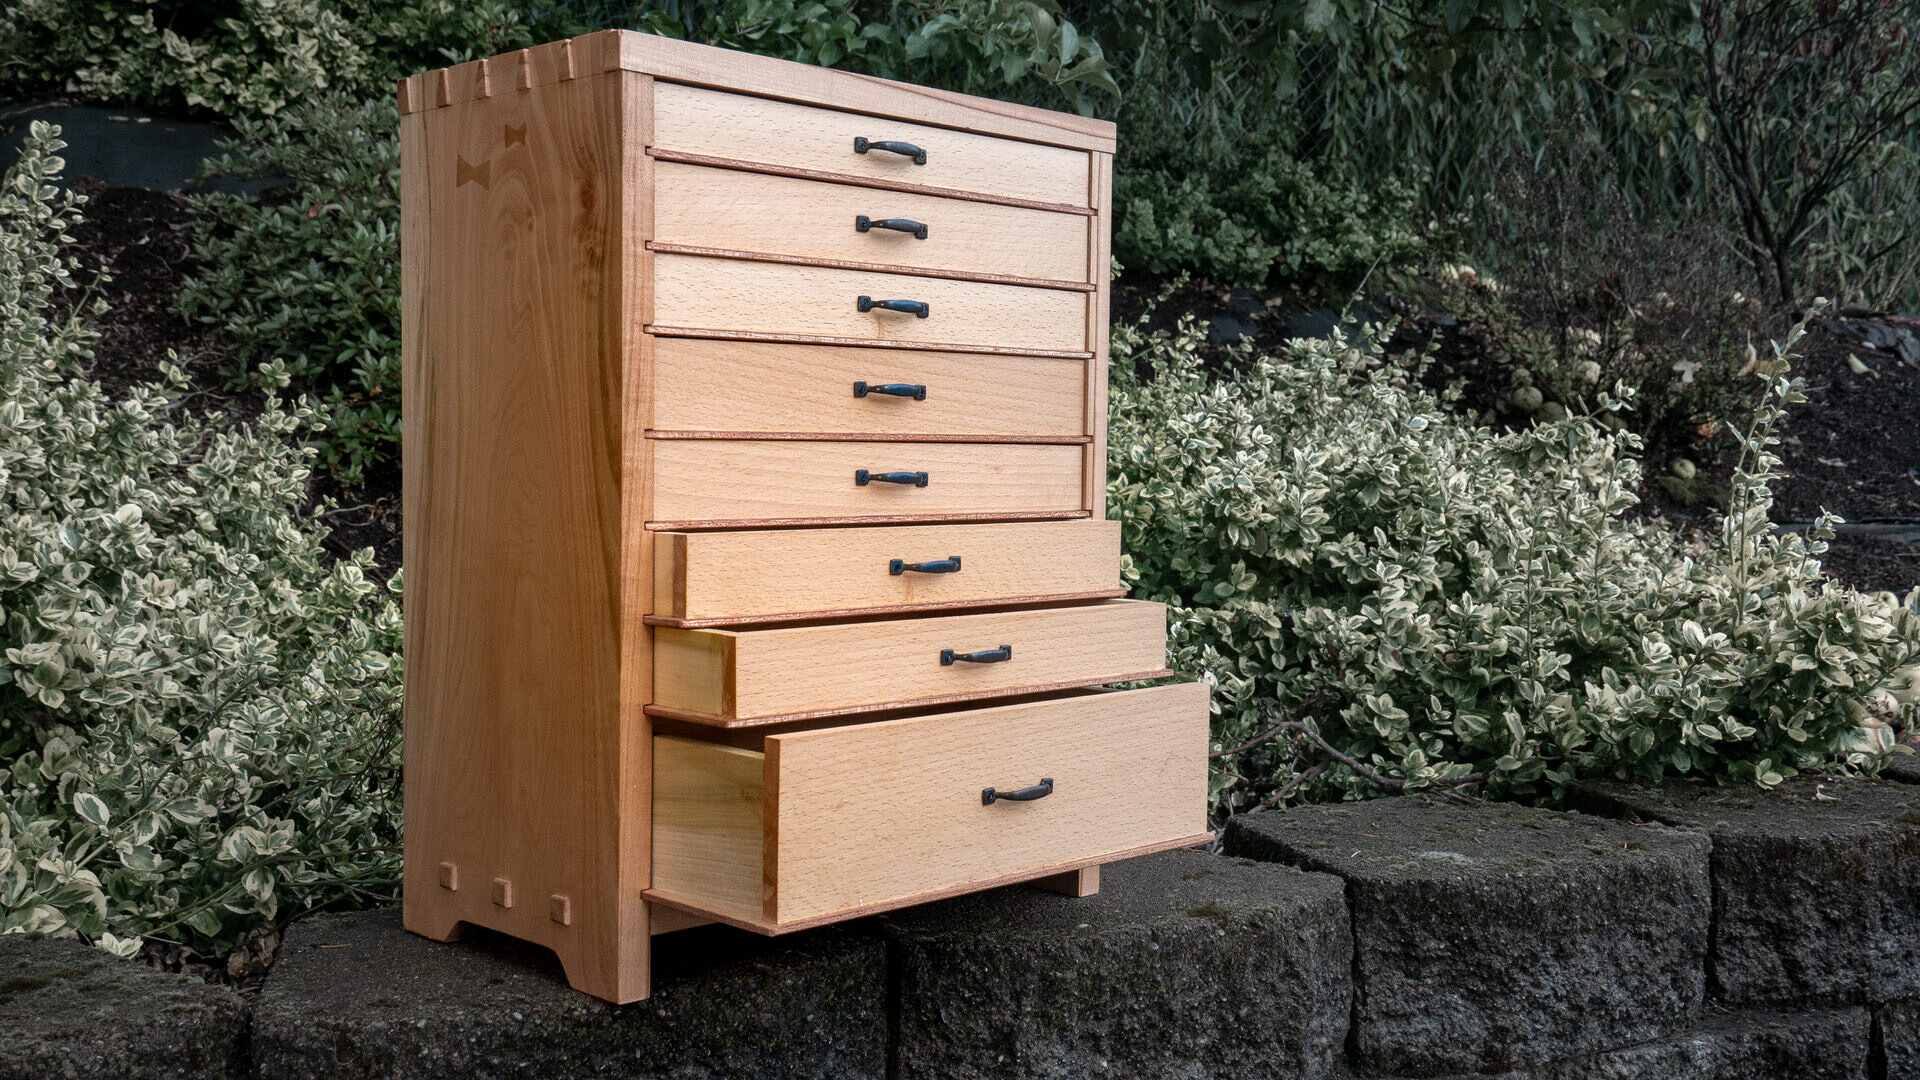
A wooden tool chest of drawers makes a very efficient and beautiful manner to organize your tools and your store.
I'm a shop slob. Any horizontal surface to be had, is probably cluttered. And so I wanted to make a small dent in my mess, with a tool breast. This article shows you how I built i, and how you can build i too.
If you'd like to easily build one yourself, I take detailed woodworking tool chest plans bachelor in my shop.
Real quick , if you lot haven't already, don't forget to follow Craftswright & Makery on YouTube , Facebook , Instagram and Pinterest to proceed up with all of the latest projects and plans!
Affiliate links are used on this folio. Meet my disclosure page for info on affiliate programs.
How to Build A Small Wooden Tool Box:
-
Dimension Material
-
Layout and rough cut pieces
-
Case Joinery
-
Pre-finish Case
-
Assemble The Tool Chest Chiffonier
-
Drawer Construction
-
Finish TOUCHES
-
Store your tools!
Dimensioning Material for The Tool Chest
For this project I purchased some heavy duty v/four soft red maple from my local sawyer.
Rough-sawn lumber is a groovy manner to salve a little extra money and accept more than control over your yield, only you do pay for the savings in labor when it comes time to surfacing and dimensioning your stock.
Sometimes I opt to spend a little extra $$$ for S3S (surfaced three sides) lumber and salve myself some fourth dimension. Either way works perfectly fine.
I broke down the lumber into more manageable pieces with a jigsaw (a good handsaw will work great too) earlier ripping the stock to width at the bandsaw.
Rough sawn lumber is most never perfectly flat or square. That's why it'south usually recommended to break it downwardly with a bandsaw/jigsaw/handheld round saw. It helps avoid kickback and is much safer.

A jigsaw turns long, united nations-wieldy, lumber into short and manageable pieces fast.
The bandsaw is one of the safest ways to rip rough-sawn lumber.
My jointer but has a half dozen" capacity so some of the stock I needed to surface with a planer sled.
The other, smaller stock, I surfaced ordinarily by jointing 1 face and one edge, then planing the opposite confront earlier taking the last rough edge to the tabular array saw.
The table saw is safe at this point since I have a very flat face and a very straight edge to reference off of the tabular array saw fence.

Action shot of the jointer flattening one face of the lath.

With ane face up apartment, I can reference it off the jointers argue to square and flatten an border.

I gave myself a paw planing the stock. Y'all tin see here the planer sled underneath the lumber.
Laying out Tool Chest Parts on Stock
Referencing the cut list in my plans (available here) I spent a proficient while laying out my pieces so I can get the best yield and grain lucifer possible. I like to use chalk to exercise this because information technology doesn't permanently marker the wood. If you lot mess upwardly all you accept to practise is wipe and repeat.
The plans still are laid out for box joints but changing them to dovetails and calculation a through tenon, or faux-tenons, isn't very difficult. Do whichever you lot're nigh comfortable with.

Sample of the DIY Small Tool Breast plans, showing the box joints originally planned.
Make the Tool Chest cabinet Joinery
With all of the stock nicely squared, apartment, and with the parts laid out I could cutting individual pieces out at the table and miter saw.
The top and bottom pieces of the instance I go out a few inches longer than they demand to exist. This way if I mess upward one side I take enough material to trim the mess-up off and start again.
It's never a bad idea to get out a little wiggle room.

Parts for the tool chest can now exist cut from larger stock at the table saw.

I cut the parts to length at the miter saw about one/16" proud.
After each new cutting at the miter saw, I foursquare the ends of the piece with a hand aeroplane and shooting board.

I'll remove the extra ane/16"with a hand plane and shooting lath, which will also guarantee the ends of my stock are perfectly 90º.
To lay out the proud dovetails I add the blade of a combination square to my stock before dropping the marking gauge. This gives me simply about 1/eight" "proudness" to the joints; common among Arts & Crafts furniture.

Marking guess set up to reference stock thickness with added combo square.

Dropping the wheel down to the next board gives a perfect width plus ~1/8".
At present when it comes to dovetails, there are a TON of awesome and highly qualified resources out there on the net showing you how to cutting accurate and groovy looking dovetails.
For the sake of brevity, I'll skip over the "how to cut dovetails" department of this build (as I besides did in the video) only I will give you some swell tips and tricks I similar.
I stack two boards together so I can cutting two sets of tails a one time. A proficient set of wing dividers makes laying out dovetails a bit easier.

Wing dividers help lay out symmetrical dovetails.
I like to run my angled tail guide lines actress long for the tails and pins. I find the extra line length helps me line my saw up with the angle easier and keep to the angle.

At that place'south something really special about learning to cut dovetails completely by manus, but if I haven't cut them in a while, or I don't want to mess my stock up, I'll use the Katz-Moses Dovetail Jig. I'm not affiliated with John, I just like his production and think it tin can assistance a lot of woodworkers to become comfortable cut dovetails.
Some of the dovetail "tricks":
-
Cut two boards and two sets of tails at once.
-
Chiseling away the waste by halving the waste until my chisel lands in the mark judge groove.
-
Strop your chisels. A LOT. I've found that by stropping after every 2-3 chops keeps the chisel sharp and me enjoying my hand tool for a very long time.
-
Just be certain not to strop the dorsum (y'all'll round the chisel) and endeavour not to round over the front bevel when stropping.
-
-
Bluish tape fob for the pin board that I learned from Mike Pekovich of Fine Woodworking's book (I highly, highly recommend).
-
And lastly, disposable utility knives to mark/cut the pivot board. They're thin, long, inexpensive and disposable in a fashion that I'm cool with. You tin put the metal bits in a "sharps" container, and then recycle the plastic with your other household recycling.

I utilise a Japanese pull saw to cut two tail boards at one time.

I chisel away the waste material by working my way upward to the marking line.

Disposable utility knives make keen dovetail mark knives.

A coping saw makes removing the waste material with a chisel easier.

I strop my chisels A LOT. Well-nigh every 2-iii chops.

Blueish tape makes cutting the pins very accurate and piece of cake.
Next I cut the dados in the case sides at the table saw. These volition act as the runners for the drawers to slide forth. Make sure to practice practiced, sound, tabular array saw safety here.
I not bad trick if you don't have a crosscut sled, or your miter judge for you table saw isn't very long, is to flip your miter estimate effectually. This will help get the cut started accurately and square.

A reversed miter gauge tin help with wide stock. Consult your possessor's transmission commencement.

Cut the dados for the drawer runners.

Top view of the finished and mirrored drawer slide dados. The plans provide greater detail on how to cut these.
Since this isn't a portable tool cabinet with wheels, I wanted to cut out a small section of the sides to give the tool chest the illusion of having feet.
I did this by marking out the curve that I liked, cutting one side out at the bandsaw, refining the cut with a rasp and carte scraper, and then transferring that line to the other side and repeating the process.
The through-tenon idea of the tool box but came to me afterwards I had already cutting my stock to length. I didn't have anymore at the proper width and I didn't want to mucilage up a console. Using simulated through-tenons solved that problem.
I placed blue painters tape on the case sides and then that I had a clear place to marker my references on. Using a marking gauge and reference materials instead of measurements makes the process quick and very accurate.
This is easier to explicate through video, or the pictures below.

I mark one side of the one-half-mortise from one side.

Tenon cloth placed between marking gauge and previously marked line.

Then marking the other one-half-mortise from the other side.

Removing the tenon material, I tin now marker a perfect width mortise.
I used a router and a spiral up-cut bit to speedily remove the waste material in the one-half-mortises, making sure to stay proud of the marking lines, before cleaning up the waste with chisels, stropping often 😉

Routers make immigration the waste from a mortise quick and easy earlier refining with a chisel.
I mark my joints with roman numerals on camouflaged places, like the back of the carcass. They won't disappear with sand paper or a card scraper like a pencil marker will, and they lend a "handmade" look that I find really mannerly.

I mark mating pieces with chiseled in Roman numerals placed at inconspicuous locations. They won't accidentally disappear similar pencil and they lend a handmade look.
Since my dovetails are proud, meaning I won't be flushing them flat, I lightly bevel and make clean upward the edges with sandpaper spray-mounted to MDF.
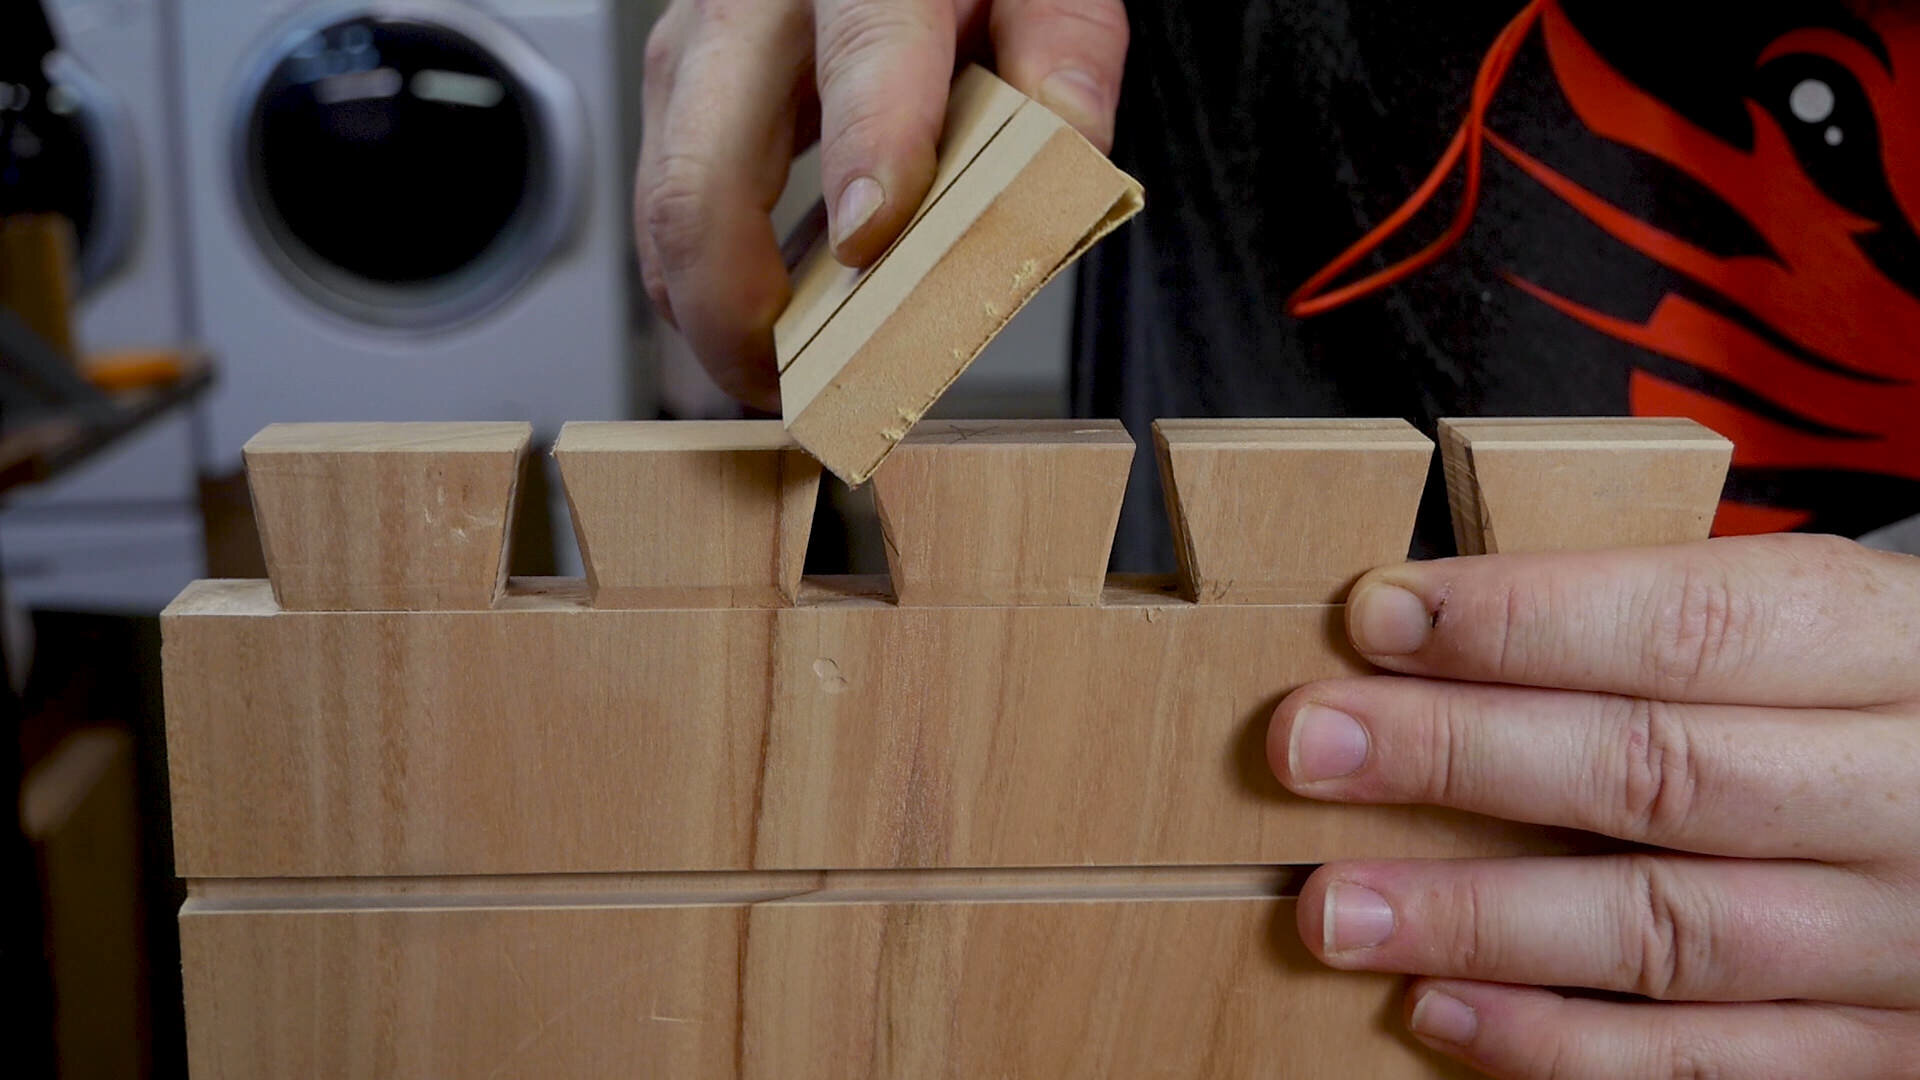
I lightly chamfer the tails and pins.

Sandpaper glued to MDF makes a groovy tool for chamfering dovetails.
The last step earlier glue up is to cut the rabbet for the example'south back plywood panel. To exercise this (since I don't have a rabbeting scrap) I used a router and a straight pattern scrap to follow a unproblematic MDF straightedge. The beauty of this technique is I can just line up the MDF with my line, clamp information technology down, set my bit depth and become! No measuring.

iii/iv" direct design bit with bearing.

Activeness shot of rabbet being cutting, design chip is post-obit MDF straightedge.
PRE-FINISHING THE Instance
Pre-finishing keeps the project clean and humming forth. It protects your last pieces from dirt and fingerprints, information technology makes mucilage up a breeze since squeeze out won't want to stick as much to finished wood, and it makes the finishing procedure less of a chore since you're doing bits and pieces of it as you lot go.
Before applying terminate, I'll prep my stock past using a card scraper to get everything prissy and smooth.

A carte du jour scraper, in my opinion, is faster than sanding and leaves a much nicer finish.
Hands downwardly, my favorite stop, is Osmo Poly-x Oil. I have a full video Here explaining why I honey this product so much (non sponsored by Osmo).
Attempt non to apply finish to anywhere at that place will be a gum joint. Similar the insides of the tails and pins, simply feel complimentary to finish the end-grain on those, y'all'll thank yourself after glue-up.

I mask off whatsoever areas glue needs to brand contact with the wood.

Applying 2 coats of Osmo Poly-Ten Oil by hand.

Pre-finishing the end-grain helps stop glue from seeping in, which can be a real pain.
Tool Breast Example Assembly and Mucilage Up

Associates is pretty straightforward. I put the case together past applying glue to the insides of the pin-board only earlier adding the tail board. This style you lot're driving glue to the inside of the case, instead of the pins pushing glue that you lot've practical to the tails, out.

Scrap MDF does a good task of buffering the case side as I tap the dovetails domicile with a mallet.

Since the dovetails are proud, some scrap cauls help apply pressure where information technology'south needed.
The most critical function of any example build is making sure that the case itself is square. If not, you'll play hell trying to get everything else to fit and operate right, especially drawers and doors.
My favorite way to check for square on a case or box build information technology so to use a set up of squaring sticks. They ensure there'south no racking and no measurement error on my part.
Again, e'er trying to reference instead of measure. It'due south just more than authentic.
I have a gear up of plans to build your own squaring sticks Hither, and a video explaining what they are and how to use them Here.

Squaring sticks are an invaluable style to make sure your case build is perfectly square.
Making the Drawers for the DIY tool Breast
The drawers for this project are of a very unproblematic design. The bottoms act equally the slides, running in dados, while the front, back, and sides are simple butt joints glued to the bottoms.
Y'all could hands make these drawers as fancy as you want, merely for some reason I notice this method elegant in its simplicity and for storing small tools it'south plenty strong.
The first thing I did was cutting the drawer bottoms to size from 1/4" plywood. And so after those bottoms are in identify (I lightly chamfer the edges with sandpaper), I could measure from 1 drawer bottom up to the next for the front end/side/back heights.
The one/4" drawer bottoms are piece of cake to cut at the tabular array saw.
Drawer bottoms in place makes measuring for drawer parts piece of cake.
With those measurements in mitt I cutting the drawer fronts to rough size and then refined the fit with a mitt plane until I achieved the reveal I wanted.
With the fronts cutting, I could cutting the poplar backs and sides.

Cutting the beech drawer fronts to length at the miter saw.

Cut the beech drawer fronts for the tool chest to width at the table saw.

A hand plane makes refining the drawer fronts very easy.

One time I had the reveal I wanted, I could apply information technology as a reference to make the sides and backs.
I predrilled the holes for the drawer pulls using Jimmy DiResta's method for finding the pull hole locations. This is easier to practise while the drawers parts haven't been assembled yet, that way yous can lay them down flat. It tin can still exist washed with assembled drawers, it'southward merely a hair harder to do.

Drilling pull hole locations while drawer parts are even so disassembled.
To gather the tool box drawers, glue the poplar backs and beech fronts to the poplar sides, and then to the plywood drawer bottoms, leaving enough space on either side for the drawer to slide. Squaring sticks help again to make certain the drawer is square and symmetrical.
With the drawers glued to the drawer bottoms, I could slide it them into their places and make sure the space was correct before clamping information technology downwards.
I also left the plywood bottoms a little proud depth-wise so I could gum the frame of the drawers flush with the back of the bottoms then trim the excess plywood in the front.
With the drawers assembled and in place I finished them 2 coats of Osmo Poly-10. I'm not exactly sure why I didn't pre-finish the drawers and saved that until after they were finished, but it worked out just fine.

Putting The FINISHING TOUCHES on the Tool Chest
With all the hard work now washed, the final things to do on the DIY Tool Chest are pretty directly forward.
I cut the false-tenons with a manus saw and squared off each end with a mitt plane at the shooting board earlier cutting the next clamper of wood.
With all of the faux-tenons cut, I placed a small dollop of glue in the half-mortises and drove the tenons abode, making sure they were 90º to the instance side.
Faux tenons assist embrace up the screws that attach the case lesser to the sides and add together some visual interest.
After they dried, I trimmed them down to match the proud dovetails and so chamfered the ends with a chisel.

I used a chip piece of plywood to keep my saw elevated from the workpiece equally I trimmed the faux-tenons.

Work from the outside in when chamfering with a chisel so yous don't tear out a corner.
Living near a hipster city has its perks, like having a vintage hardware shop nearby. These drawer pulls are from the nineteen-teens and came from a huge chiffonier shop in Portland that went out of business later on World State of war two.
Something about how they didn't quite fit the aesthetic perfectly was appealing to me. Almost similar taking a really classy collectible car and putting a doofy bumper sticker on information technology. Shows that the person driving (or making in this case) is man.
All hipster joking aside, if you're in the Portland area make sure to stop by Old Portland Hardware. Beautiful shop.
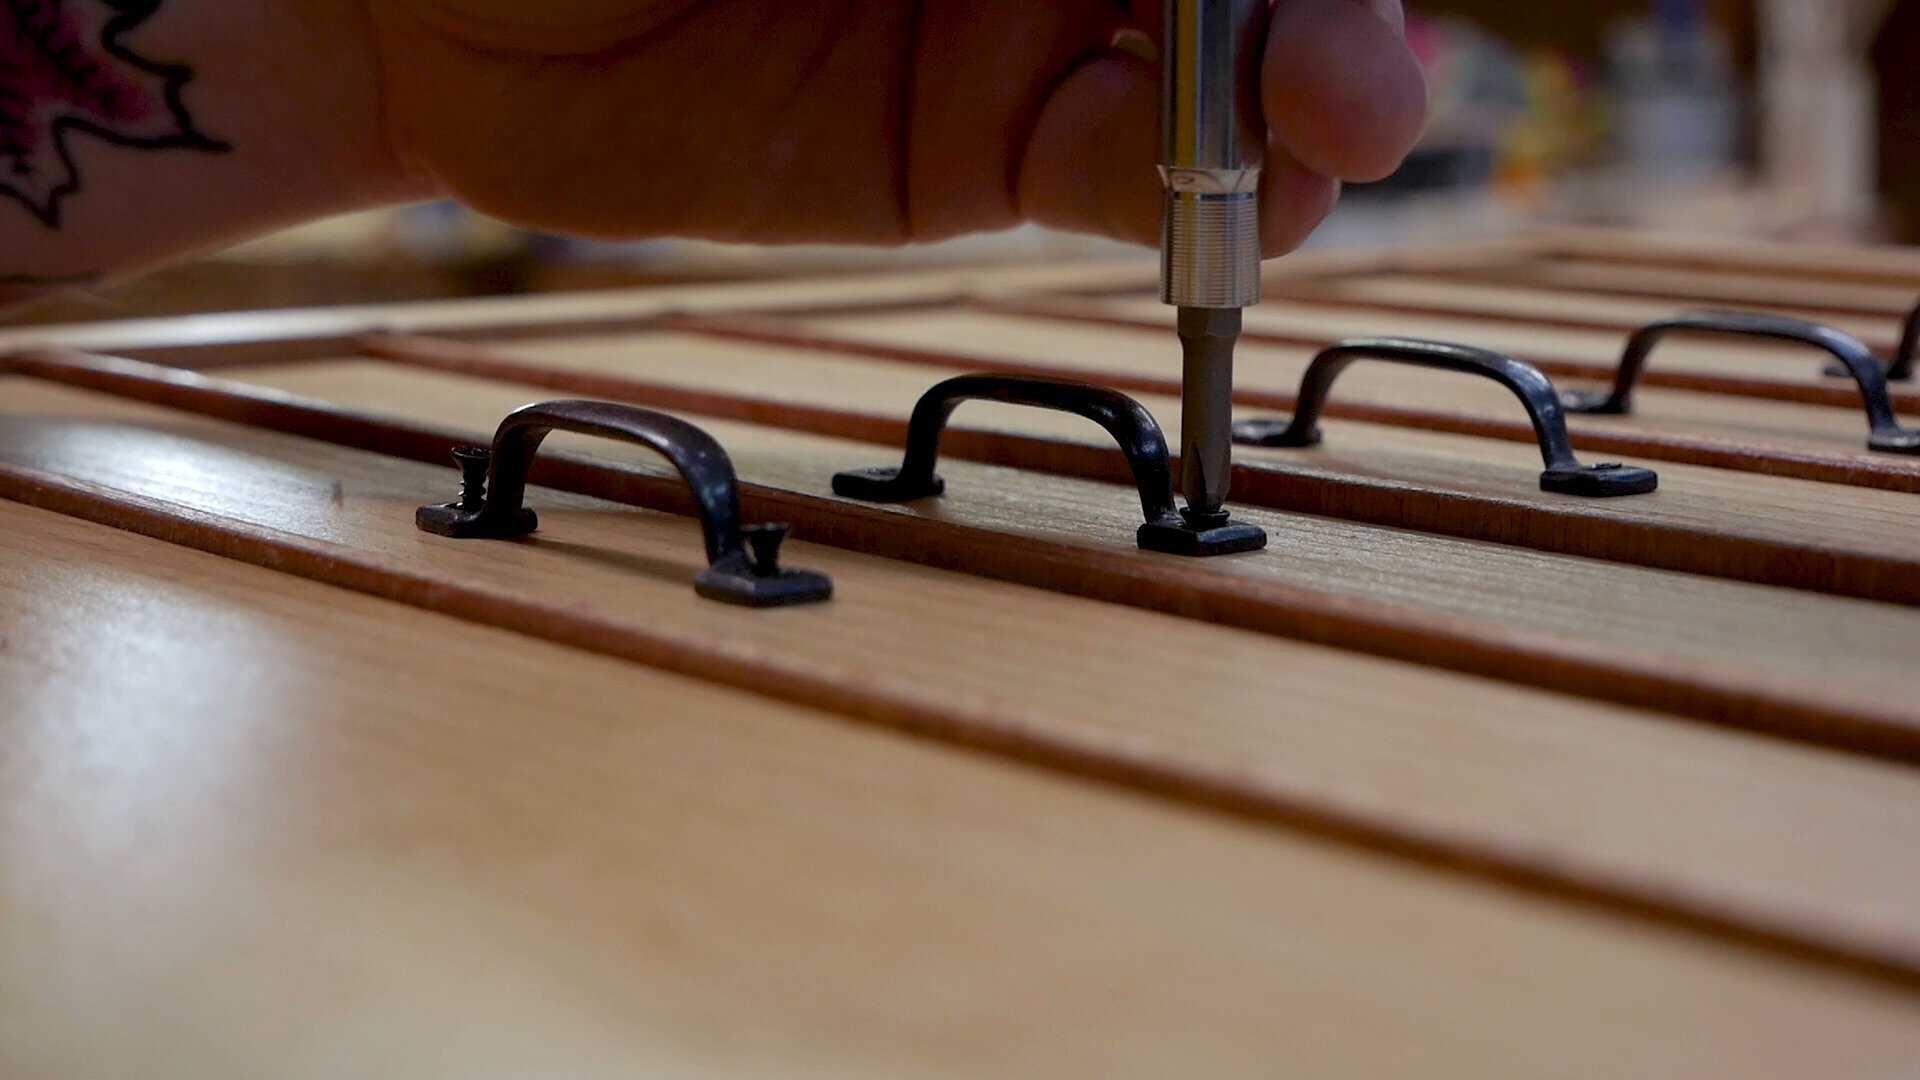
Vintage drawer pulls sourced from Old Portland Hardware here in Oregon.
Fourth dimension to organize your tools in your new wooden tool chest!

With your DIY Tool Chest consummate, it's time to organize your small tools, knick-knacks, and store!
This was a very fun build that pushed my skills to the limit: solving problems, dealing with crude-sawn lumber, dovetails, faux-tenons, unlike styles of drawers, etc.. But now, I have a place for pocket-size tools that not just works well, but holds a truly surprising amount of things in a very modest footprint. Northward
ot to mention I get that warm and fuzzy feeling every time I open a drawer of, "Hey, I fabricated this. It works, and it looks good. and I'm the one that did it."
My merely hope is that you terminate up building one, or something like, and take that aforementioned feeling of achievement.
Continue upwards the good piece of work, because there'southward good work in the making!

Source: https://craftswright.com/blog/how-to-make-a-wooden-tool-chest-with-drawers
0 Response to "Wooden Drawer Tool Chest Plans"
Post a Comment